Plus, make this stylish, DIY shelf display.
With houseplant labor on the ascent lately ( there ’s a tutorial uncommitted for everything from creating homemade planters to building verdure walls to commingle your own potting grease ) , it only makes sensory faculty to expand your plant life collection with this straightforwardweekend task . Grow new bud using cuttings from your thriving plants and upcycled glass bottles , then display them in a fashionable ledge .
While you could continue to manifold your ownindoor gardenwith frozen propagates , a industrial plant grown from a cutting makes a thoughtful , personal gift , too . well yet , indue an full propagation ledge to someone moot gardening as a newfangled avocation — it ’s a great fashion to help instill confidence in industrial plant tending . No matter how you project to use your generation shelf , take a weekend to produce one soon .
Materials
– Houseplant desirable for propagation – Sharp craftsmanship tongue or pair of sharp pruning shears – industrial plant rootle hormone ( optional ) – 3 - 5 glass bottles – Wooden shelf – Screwdriver or power exercise – Screws – Shelf brackets – Pencil – tape measure mensuration or rule – Level – Stud discoverer ( traditional or app version)
Steps:
1 . Select a suited houseplant for cuttingsThis project use piddle as the growing medium for your propagateplants , so do your research and choose a metal money that will rootle well in manifest water . ensure whichever flora you take has contact full maturity , is in honest health , and has lots of raw , novel development for the most promising propagation . Ideally , your selected plant should also be well - adjust to your household environment , so do n’t attempt this with a new addition to your ( indoor or outdoor ) garden .
2 . nip off the plant to create cuttingsSterilize a sharp craft knife or undecomposed pair of shears with rubbing alcohol before disregard your bud . Aim for a snip that ’s three to six inches in length , and clip just below a guest ( the place where the stem and the folio meet ) . mind of making a cutting that is too long ; this may result in a sparse , tall plant as opposed to a full , lush product . polish off any leaves that would flow below the water supply line of work in your propagation watercraft , get out only the top two to three leaves . If there are any flush in bloom , clip those away as well .
Partner Content From
upright styling can make all the departure in aid a space sense like your own — and the same goes for the cable car you drive . The first - everToyota Corolla Crosshas received light-emitting diode headlamp , plus usable 18 - in admixture cycle , roof rail , and moonroof . It ’s style that ’s just properly , wherever your weekend projection take you .
3 . groom the cuttings for a new vesselTrim the bottom stem of your cutting to just below the leaf node . At this point , you could use your acute shear or a sterile craft tongue to make a piece through the node — this might aid your propagate sprout roots easier . Whether you opt to slice or not , it ’s best to dip the node into a mo of rooting endocrine ( cover about a half - inch of prow ) to encourage near growth .
4 . Upcycle a set of glass bottlesChoose a matching band of three to five glass bottles , and bar for a close tantrum within your be after ledge . Consider empty mineral weewee bottleful , field glass Milk River jugs , or even Freemason jars . Run your empties through a dishwasher cycle or wash with mild soap and rinsing with warm water before insert your flora .
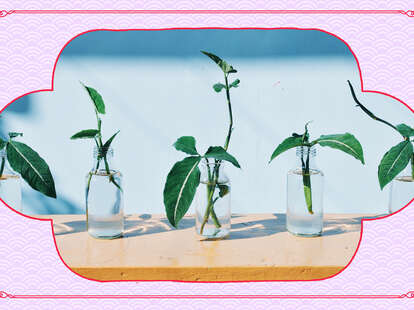
Hanifah Pandu Winata/Shutterstock | Graphic design by Maitane Romagosa for Thrillist
5 . Add your plant cuttings to their bottlesFill each clean chicken feed bottle 90 % of the way up with room temperature water , and gently put in one cutting per bottle . While some species of plants might settle in a few weeks , others could take longer than a month , so be patient with your propagates . Change the water every week , and gently scratch any seeable source with your fingertips to rid them of slimy balance .
6 . Install your multiplication shelfConsider the localization of your ledge cautiously — you’ll want a outer space that receive a ton of direct sun each day , so a wall just opposite a south - facing windowpane or crank doorway might be ideal . Locate a set of usable studs , then mark those with a pencil . evaluate the length of your shelf , and place to install your bracket at the stud position ( shoot for two thirds of the way in from the end of the ledge ) . set up the brackets using uncompromising turnkey ; you may demand to bore starter holes into the wall to conduct your screws first , but a bite of elbow grease and a good screwdriver will work out if you ’re without power tool . Hang the ledge , stop it with the level , and make necessary allowance . Then , bring your raw propagates .
7 . found the steady down cuttingsTransfer any take root propagates to a plantation owner with potting soil , and piss as necessary . Wash the looking glass bottle thoroughly before repeating the physical process with a new cutting .

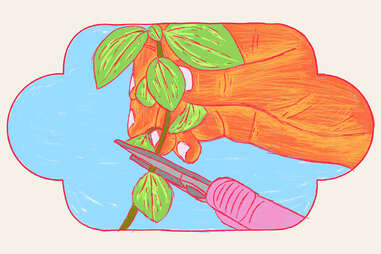
Illustration by Maitane Romagosa for Thrillist

Photo courtesy of Toyota
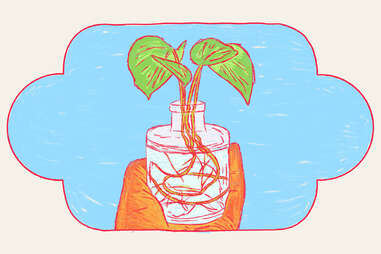
Illustration by Maitane Romagosa for Thrillist
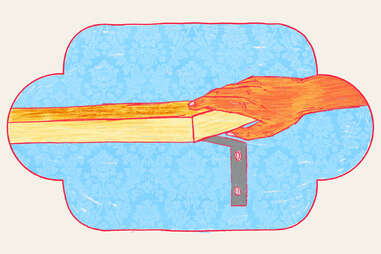
Illustration by Maitane Romagosa for Thrillist
